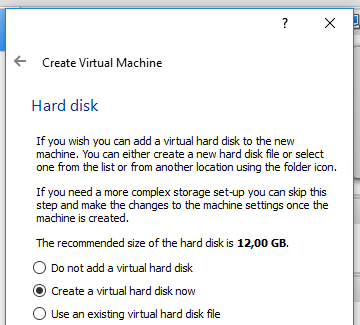
Let’s say you have created an Oracle Enterprise Linux 7.2 Virtual Image in VirtualBox where you didn’t pay enough attention to the details, and you went with the default size of the Virtual Disk.

Weighing in at only 12GB, it’s not the largest of drives, even though that seems to be what Oracle recommends. If you want to install, say, Oracle Service Bus on that machine, you are going to run into issues there. It just isn’t enough.
The solution is to resize the Virtual Disk from 12GB to a larger number, and there are a few steps needed to accomplish this goal.
Our starting point is:
Disclaimer: you should always make a backup of the Virtual Disks before proceeding with modifying them. There always is the chance of thing going awry, and it might very well be because of something you read here. Proceed with caution and at your own risk. 
How to resize a virtual disk for a OEL7 machine
Step 1: Resize the Virtual Disk (on host)
Step 2: Resize the partition of the guest
Step 3: Extend the filesystem (on the guest)
Step 1: Resize the Virtual Disk
Virtual Disks are by default limited to a certain size, and this needs to be larger than what it currently is. All commands are run from the installation directory of Oracle VirtualBox, here: “C:Program FilesOracleVirtualBox”, and use the program VBoxManage.exe (on Windows)
The command is modifyhd, and takes –resize <MB> as parameter. 50GB is 51200MB, so that’s what we put in. The full command is below.
VBoxManage.exe modifyhd C:VMsoel7-ofmwoel7-ofmw.vdi --resize 51200
This will give the following output:
C:Program FilesOracleVirtualBox>VBoxManage.exe modifyhd C:VMsoel7-ofmwoel7-ofmw.vdi --resize 51200
0%...10%...20%...30%...40%...50%...60%...70%...80%...90%...100%
The size of the Virtual Disk shows as 50GB in the Virtual Media Manager, so we are all done here!

Step 2: Resize the partition
We increased the size of the (virtual) physical disk in the previous step, so now we have to modify the partitioning on the disk for it to show in the guest OS.
OEL 7 does not provide the appropriate tooling for this step, so we’ll have to revert to the excellent GParted. (In order for the LiveCD to work properly, click here!)
 Select the partition you want to extend (here: /dev/sda2) and click Resize/Move.

Punch in 51200 (or whatever size you want it to be, equal or less than the size you resized the Virtual Disk to) and click Resize. You should see the result as in the second picture.


Click Apply, and then again on Apply. This will make the changes you made permanent, and pretty much irreversible. This is also the moment when things can go wrong, so fingers crossed!
It should eventually show this:

You now successfully resized the partition to 49,51GB. Congratulations!
On to the next step.
Step 3: Extend the filesystem
We need the guest OS running for this step, so boot up your Virtual Image. Log on as a user, and switch to root.
Be aware: dragons may be ahead.
[root@localhost oracle]# lvdisplay
  --- Logical volume ---
  LV Path                /dev/ol/swap
  LV Name                swap
  VG Name                ol
  LV UUID                cKJvJh-xbYz-9jne-SU2S-97Yw-lj1j-53yUcO
  LV Write Access        read/write
  LV Creation host, time localhost.localdomain, 2016-06-16 12:48:17 +0200
  LV Status              available
  # open                 2
  LV Size                1.20 GiB
  Current LE             307
  Segments               1
  Allocation             inherit
  Read ahead sectors     auto
  - currently set to     8192
  Block device           252:1

  --- Logical volume ---
  LV Path                /dev/ol/root
  LV Name                root
  VG Name                ol
  LV UUID                NPUq9v-aCO0-QQ0N-e5YM-B9hv-ziNn-m4no0Y
  LV Write Access        read/write
  LV Creation host, time localhost.localdomain, 2016-06-16 12:48:17 +0200
  LV Status              available
  # open                 1
  LV Size                10.27 GiB
  Current LE             2628
  Segments               1
  Allocation             inherit
  Read ahead sectors     auto
  - currently set to     8192
  Block device           252:0
We are interested in the /dev/ol/root Logical Volume, and we can see it’s still shy of 11GB. Time to make this bigger!
First, we need to extend the Logical Volume, which is done through lvextend.
[root@localhost oracle]# lvextend -L 48G /dev/ol/root
  Size of logical volume ol/root changed from 10.27 GiB (2628 extents) to 48.00 GiB (12288 extents).
  Logical volume root successfully resized.
By default, an OEL7 installation uses the xfs filesystem, and you can use xfs_info to get some more info on it. This is optional.
[root@localhost oracle]# xfs_info /dev/ol/root
meta-data=/dev/mapper/ol-root    isize=256    agcount=4, agsize=672768 blks
         =                       sectsz=512   attr=2, projid32bit=1
         =                       crc=0        finobt=0
data     =                       bsize=4096   blocks=2691072, imaxpct=25
         =                       sunit=0      swidth=0 blks
naming   =version 2              bsize=4096   ascii-ci=0 ftype=0
log      =internal               bsize=4096   blocks=2560, version=2
         =                       sectsz=512   sunit=0 blks, lazy-count=1
realtime =none                   extsz=4096   blocks=0, rtextents=0
To extend the filesystem over the entire Logical Volume, the command xfs_growfs is used. It takes the filesystem as it’s parameter, here: /dev/ol/root.
[root@localhost oracle]# xfs_growfs /dev/ol/root
meta-data=/dev/mapper/ol-root    isize=256    agcount=4, agsize=672768 blks
         =                       sectsz=512   attr=2, projid32bit=1
         =                       crc=0        finobt=0
data     =                       bsize=4096   blocks=2691072, imaxpct=25
         =                       sunit=0      swidth=0 blks
naming   =version 2              bsize=4096   ascii-ci=0 ftype=0
log      =internal               bsize=4096   blocks=2560, version=2
         =                       sectsz=512   sunit=0 blks, lazy-count=1
realtime =none                   extsz=4096   blocks=0, rtextents=0
data blocks changed from 2691072 to 12582912
Success!
df -h now reads nearly 50G, so now we have more space. Happy days!


