
In this blogpost, we will configure the Nexus repository that we introduced in the previous post. We will create a basic repository setup with three levels: snapshot repository for our development artifacts that are only for testing, a releases repository for final artifacts that might go to a live environment, and a proxy repository that can access external repositories in order to integrate them with our own artifacts.
A virtual layer will be put on top of these: the group repository. This allows us to use fallback rules: if the artifact is not in the first repo, we will search the second etc. The group repository can be used to pull all artifacts, while the snapshot and release repos are to push artifacts.
We will also create the minimal users and permissions to access the system.
This post is part of a series about creating a continues integration platform for home use.
Configure the artifact repository
Take your browser to the Nexus login page at http://localhost:8081. Log in with the admin user: At the top-right side of the screen you find the Sign in button. Click it and enter the default credentials
name: admin
password: admin123
Now is a good time to change your credentials to something more secure: click on the admin button in the top bar, and select change password.
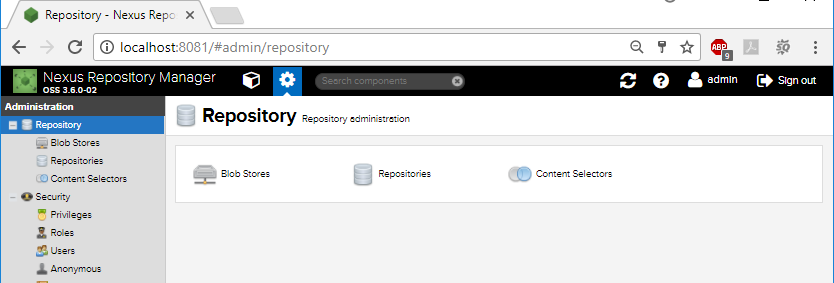
After changing your password, proceed towards the Repository administration page by clicking on the clog icon in the top-bar. You should see a navigation menu on the left with different areas for configuration.

Nexus configuration page
Use the left side navigation to go to the Repositories, it’s the second item from the top. It will show you some default repositories that are configured and ready to use. We will go through the details.
The repositories in Nexus
| Name | Type | Format | Status |
|---|---|---|---|
| maven-central | proxy | maven2 | Online – Ready to Connect |
| maven-public | group | maven2 | Online |
| maven-releases | hosted | maven2 | Online |
| maven-snapshots | hosted | maven2 | Online |
| nuget-group | group | nuget | Online |
| nuget-hosted | hosted | nuget | Online |
| nuget.org-proxy | proxy | nuget | Online – Ready to Connect |
- The maven-central repository is of type proxy, which means that it doesn’t store data locally, but instead it forwards all requests to the maven-central repository on the internet.
- The maven repositories are using the format maven2, which means that artifacts are stored using the identifier artifactid,groupid,version from the maven build system.
- The maven-releases and maven-snapshots repositories are hosted, which means that the files are stored and managed in this Nexus instance.
- The maven-public repository is of type group. The group consists of the other three maven repositories we just discussed above. (the group members are not visible on this screen). When a group repository receives a request, it tries all the member repositories to find a match, so it aggregates multiple other repositories into a single location.
- The nugget repositories follow the same pattern with a proxy to the internet, a hosted repo for the local data and a group to aggregate both locations into one. It uses the nugget format to identify the artifacts.
- Apart from the identification of the artifacts, each format also has it’s own api used to store and retrieve binaries. By selecting the correct format, you enable the api.
Since we are storing docker images in our build, we will create four extra repositories:
- A proxy repository to access the master docker repository on the internet
- A releases repository where we store our final builds, this repo is write-once, read many, so that we can’t accidentally overwrite a published artifact
- A snapshots repository where we store our work in progress. This repo allows overwriting exiting binaries, so that we can rebuild fast and often.
- A group repository to aggregate the three previous repositories in one place.
The proxy repository
Click on the “Create repository” button

Select docker (proxy)
Name your repo, for example “docker-hub”. It should be marked as Online.
Scroll down and enter the Proxy – Remote storage field. It should read https://hub.docker.com

Mark the checkbox “Use certificates stored in the Nexus truststore to connect to extrnal systems” and click view certificate. It will show some certificate information like the screenshot shown here. Ensure that it is the certificate you expect to see, and press the Add button.
Leave the other options as-is, scroll down to the bottom of the page and press “Create repository” to finish.
You now have your first repository, which is a virtual read-only copy of docker hub.
The releases repository
Create a new repository. This time, we select type docker (hosted) and name it “docker-releases“.
In the section Repository connectors, we mark the http checkbox, and enter the number 8082 in the data field behind the checkbox. This will make the repository available on the port number 8082 inside the docker container. This will allow us to connect to the repository later on.
Finally we scroll down to the section Hosted. The deployment policy is by default “Allow redeploy”. Since this is a releases repository, and we don’t want to overwrite existing artifacts, we have to select “Disable redeploy” here, so all artifacts become write-once.
Press “Create repository” to finish.
The snapshot repository
Create a new repository. Select type docker (hosted) and name it “docker-snapshots“.
In the section Repository connectors, we mark the http checkbox, and enter the number 8083 in the data field behind the checkbox.
Leave all other settings at default.
Press “Create repository” to finish.
Aggregating into a single repository
Create a new repository. Select type docker (group) and name it “docker-public“.
In the section Repository connectors, we mark the http checkbox, and enter the number 8084 in the data field behind the checkbox.
Scroll down to the bottom and the other three docker repositories to the group. The order is important here. Nexus will try to find artifacts by trying the repositories from top to bottom. At the top should be docker-releases, then docker-snapshots and finally docker-hub. Add all three and make sure the order is correct.
Press “Create repository” to finish.
Summary
We have now added four repositories, as shown in the table below
| Name | Type | Format | Status | Purpose |
|---|---|---|---|---|
| docker-central | proxy | docker | Online – Ready to Connect | Proxy towards docker.io so that we can use public docker images as if they were part of our repository |
| docker-public | group | docker | Online | One central access point for pulling docker images, regardless of the physical repository where they are stored |
| docker-releases | hosted | docker | Online | A repository for our final builds. These docker images are protected from accidental overwriting |
| docker-snapshots | hosted | docker | Online | A repository for our development builds. These docker images can be pushed repeatedly, providing easy of use during development |
Security in Nexus
Before we can access the repositories, we will have to set up some permissions. We will start by creating a role for docker.
Creating the docker role
Enter the role id “nx-docker” and the role name “Docker user“.

Add four priviliges:
- nx-repository-admin-docker-docker-hub.*
- nx-repository-admin-docker-docker-public.*
- nx-repository-admin-docker-docker-releases.*
- nx-repository-admin-docker-docker-snapshots.*
- nx-repository-view-docker-*-*
This will grant rights for all four docker repositories to all users that have this role. Press “Create role” to finalize the role.

Next we can add a user.
Create a local user
Navigate to the Users section via the menu on the left side and select create local user. Provide the information for the user you wish to use. Make sure that:
- Status is Active
- Roles Granted contains “Docker user“
Press “Create local user” to finish.
Activate the docker realm
As a final step, we want to use the docker login system. Therefore we need to activate the docker security realm. In the left side menu, navigate to Realms. It will show the security realms. Add Docker Bearer Token Realm to the active realms and press Save.
Conclusion
This concludes the setup of Nexus itself, however we still can’t access Nexus with our tooling. Only the admin interface is exposed. The next blog will guide us through the setup of the reverse proxy, so that we can have a secure connection into the repositories.
The post Nexus configuration for docker appeared first on BIT.