The guys from HelloBeer are still recuperating from a massive hangover after recently celebrating their 15th blog post. Massive amounts of quality beers were consumed and great new ideas for future blog posts were discussed during the festivities..
Time to take a small pause! Before continuing our HelloBeer series, let’s do a quick tutorial on running a Camel integration on a standalone Red Hat JBoss EAP server.
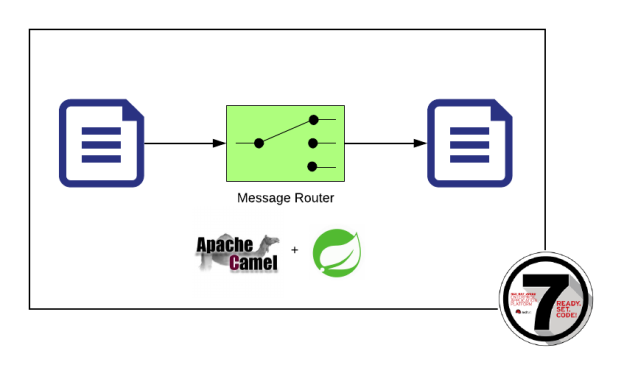
So, in this blog post we’re gonna build a simple File-to-File integration with some content-based-routing added for fun. The integration is based on the default project generated from the maven archetype camel-archetype-spring. For deployment we’re gonna use some integrated features in IntelliJ provided by the JBoss Integration plugin.
Final code can be downloaded from GitHub and is available here.
 EAP 7 installation
For this blog I’m using EAP 7.1.0. Which can be downloaded here.
Installation instructions are available here.
For simplicity sake I just installed the server in a directory in my local home, i.e. ~/EAP-7.1.0.
The project
Like I already said, the project is a simple file-to-file camel integration with a little content-based routing using the Spring DSL. Some pointers for setting up the project can be found here and here. Let’s break it down.
pom.xml
The most interesting part of the maven pom file are the camel and spring dependencies.
<dependencyManagement>
  <dependencies>
    <!-- Camel BOM -->
    <dependency>
      <groupId>org.apache.camel</groupId>
      <artifactId>camel-parent</artifactId>
      <version>2.22.2</version>
      <scope>import</scope>
      <type>pom</type>
    </dependency>
  </dependencies>
</dependencyManagement>

<dependencies>
  <dependency>
    <groupId>org.apache.camel</groupId>
    <artifactId>camel-core</artifactId>
    <version>${camel.version}</version>
  </dependency>
  <dependency>
    <groupId>org.apache.camel</groupId>
    <artifactId>camel-spring</artifactId>
    <version>${camel.version}</version>
  </dependency>
  <dependency>
    <groupId>org.springframework</groupId>
    <artifactId>spring-web</artifactId>
    <version>5.1.2.RELEASE</version>
</dependency>
We’re importing the camel-parent and are only using camel-core – the File component is part of the core -. The dependency for camel-spring is needed to use the Spring DSL and the spring-web dependency is needed to run the application as a Spring web application.
web.xml
Apart from the spring-web dependency you also need to add a listener to the web.xml (present in the src/main/webapp/WEB-INF folder) file to enable Spring:
<web-app xmlns="http://java.sun.com/xml/ns/javaee"
         xmlns:xsi="http://www.w3.org/2001/XMLSchema-instance"
         xsi:schemaLocation="http://java.sun.com/xml/ns/javaee
         http://java.sun.com/xml/ns/javaee/web-app_2_5.xsd"
         version="2.5">
  <listener>
    <listener-class>org.springframework.web.context.ContextLoaderListener</listener-class>
  </listener>
</web-app>
applicationContext.xml
Now the last piece of the puzzle is the actual integration. The route is coded in Spring DSL and has been put in the (default) applicationContext.xml file present in the src/main/webapp/WEB-INF folder.
<camelContext xmlns="http://camel.apache.org/schema/spring">
  <!-- here is a sample which processes the input files
       (leaving them in place - see the 'noop' flag)
       then performs content based routing on the message using XPath →
  <route>
  <from uri="file:{{env:HOME}}/Work/data?noop=true"/>
    <choice>
      <when>
        <xpath>/person/city = 'London'</xpath>
        <log message="UK message"/>
        <to uri="file:{{env:HOME}}/Work/data/messages/uk"/>
      </when>
      <otherwise>
        <log message="Other message"/>
        <to uri="file:{{env:HOME}}/Work/data/messages/others"/>
      </otherwise>
    </choice>
  </route>
</camelContext>
This is the default route generated by the maven archetype camel-archetype-spring. The route hopefully speaks for itself. I’ve adjusted it so it checks the $HOME/Work/data directory for new xml files to process instead of a data directory present in the project.
jetty
To enable quick testing without having to deploy to EAP every time, I’ve also put the jetty plugin in the maven pom. So with all the pieces now in place, we can verify if our basic integration actually works.:
mvn jetty:run
Now if you copy the example xml files (available in the data directory) in your $HOME/Work/data directory you can see the magic happen:

Deploying
For deployment to the EAP server we’re gonna use the JBoss Integration Plugin in IntelliJ
After we’ve installed the plugin, we can add a configuration to the project to fire up the server and deploy the war to EAP. For pointers see here and here.
First let’s add an artifact to the project pointing to a deployable (File > Project Structure > Artifacts).
Select Web Application Exploded > From Modules…, select the project and, after creation, change the Output directory to a subdirectory of the target directory (so a mvn clean will clean it up):

Now that we have a deployable artifact defined, the last step is to add a configuration to the project to deploy the artifact to EAP as part of the build.
Click on Add Configuration… and add a configuration based on the JBoss Server Local template.
Give the configuration a meaningful name, configure the Application Server to point to the EAP installation home and add the artifact created in the previous step to the Deployment tab:

Testing
Now let’s run our new configuration and see what happens:

Looking at the last three log entries, we can see that our integration is working nicely after deployment to EAP.
The management console being opened automatically, also shows our exploded archive in the Deployments section:

Summary
In this blog post we’ve built a simple camel integration using the Spring DSL, packaged it as a Spring Web application and deployed it to a local JBoss EAP server with a little help from IntelliJ.
References
- https://github.com/rphgoossens/HelloWorldProjects/tree/master/camel-spring-eap
- https://rphgoossens.wordpress.com/2018/09/27/hello-beer-camel-quality-control
- https://developers.redhat.com/products/eap/download
- https://developers.redhat.com/products/eap/hello-world
- https://www.baeldung.com/spring-apache-camel-tutorial
- http://camel.apache.org/tutorial-on-using-camel-in-a-web-application.html
- https://www.jetbrains.com/help/idea/creating-and-running-your-first-java-ee-application.html#explore_run_config
- https://www.jetbrains.com/help/idea/run-debug-configuration-jboss-server.html