
In order to build our CICD platform, we will start with the creation of an artifact repository. The artifact repository can be used in various locations in the pipelines, has no dependencies itself, and as such it is a great starting point.
This repository will hold all the binaries for our project: it will store and distribute the deliverables and all dependencies. This ensures that all developers use the same binaries, and that the exact same binary goes to production. It provides a central location for managing and securing the libraries that are used in the tools. Furthermore it can host build plugins, docker images and tools that are required by the CICD platform itself.
We opt for Nexus, since the opensource community version provides support for docker. Competitors like Artifactory do provide the same, but only for the commercial version. Since this project is for home use, we choose to go cheap.
This post is part of a series about creating a continues integration platform for home use.
Configure the artifact repository
Workspace setup
Lets start off and create a folder to hold our environment.
mkdir demo
cd demo
It is a good idea to put this folder under version control right now. It will contain critical configuration for your project, and you will want to have proper version management in place for the files in this folder. We will keep version control out of scope for this walkthrough, but is good to remind yourself to commit your changes regularly so that you can quickly reproduce the system if needed.
Ironically, the CICD workspace repository is the only repository that won’t have a build pipeline attached.
The artifact repository service
Next, we will create a simple docker-compose.yml file to start our repository. Start your editor and create the file.
version: '2'

services:
  nexus:
    image: sonatype/nexus3:3.12.1
    volumes:
      - "nexus-data:/nexus-data"
    ports:
      - "8081:8081"
    expose:
      - "8082"
      - "8083"
      - "8084"
      - "8085"
      - "8086"
      - "8087"
      - "8088"
      - "8089"
      - "5000"

volumes:
  nexus-data:
What this does
- We specify that we use docker-compose version 2. It’s a bit out-dated, but I use it for backward compatibility. You might be able to move on to version 3, but we won’t be using any of the new features yet.
- We define a service, a docker container called nexus. The name is not only something to recognize the container by, but it is used as a network identifier inside docker. Each service can be considered a small virtual machine, and the networking between these services will be done through the docker network layer, which uses the name for routing.
- The container is based upon the official sonatype/nexus3 image, which will be downloaded from docker-hub.
- Always use explicit versioning. It may be tempting to use latest or stable when you select an image, but this may result in your application failing to start when you enter docker-compose up next time, due to breaking changes in the newer image that somebody else pushed to docker-hub.
- A volume called nexus-data will be mounted at location /nexus-data inside the docker container. The program running inside the container will be able to store its data on the volume.
- The port 8081 inside the container will be accessible on port 8081 from the outside world, aka your computer and anybody else on the local network. This allows us to use a browser on port 8081 to administrate the running nexus. You could select any available port for the second (external) port number, but the first number much match the configuration of nexus, which is by default configured to host on 8081.
- We expose a range of ports afterwards. These ports are not visible to the outside world, but when we add more docker containers to this compose file, the new containers can communicate with nexus on the exposed ports. The ports definition is for ports that need to be accessed from outside of docker-compose, the expose ports are only accessible inside the same docker-compose.
- Finally we declare the volume. This is a data storage location that can survive reboots. All data inside a docker container normally gets flushed when the container is stopped. A new container will be created with a clean filesystem as defined in the build process. To let the container persist data, it will need an external data store, and for file systems this is done through a volume.
That is it. We can now start our first container and use the browser to configure it.
Testing
Start the container by typing the following command on the command-line:
docker-compose up
The up command tells docker-compose to pull the base images from the internet and to do the initial setup for the containers and volumes.
You will see a log-trace on the terminal about downloading the image layers from docker, followed by the following lines:
Creating network "demo_default" with the default driver
Creating volume "demo_nexus-data" with default driver
Creating demo_nexus_1 ...
Creating demo_nexus_1 ... done
Attaching to demo_nexus_1
nexus_1  | 2017-11-09 09:01:08,901+0000 WARN  [FelixStartLevel] *SYSTEM uk.org.lidalia.sysoutslf4j.context.SysOutOverSLF4JInitialiser - Your logging framework class org.ops4j.pax.logging.slf4j.Slf4jLogger is not known - if it needs access to the standard printl
n methods on the console you will need to register it by calling registerLoggingSystemPackage
nexus_1  | 2017-11-09 09:01:08,909+0000 INFO  [FelixStartLevel] *SYSTEM uk.org.lidalia.sysoutslf4j.context.SysOutOverSLF4J - Package org.ops4j.pax.logging.slf4j registered; all classes within it or subpackages of it will be allowed to print to System.out and Sy
stem.err
Let it run for a minute, nexus takes some time to setup the data store for first use.
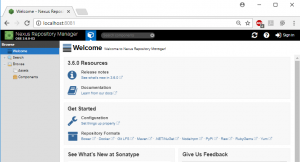
Start up your browser and go to the nexus web page on http://localhost:8081/ It should show you the welcome page.

Nexus
Conclusion
This concludes part 1 of our walkthrough. We now have a running Nexus instance. You can stop it using ctrl-c in the terminal where docker runs, or the command docker-compose stop in the configuration folder. It can be restarted again by typing docker-compose start (not docker-compose up) in the folder where the docker-compose.yml file is stored. Use the command docker ps to see if your instance is running:
> docker ps

CONTAINER ID        IMAGE               COMMAND             CREATED             STATUS              PORTS                                             NAMES
2ff5f21afccc        sonatype/nexus3     "bin/nexus run"     18 minutes ago      Up 18 minutes       5000/tcp, 8082-8089/tcp, 0.0.0.0:8081->8081/tcp   demo_nexus_1
It might seem a bit overkill to create a compose file for just one docker image, but it will become clear in the next blogpost. Nexus by itself doesn’t provide the secure access that is required by docker to use it as a repository. We will need to add a reverse-proxy, like Nginx, to hold the openssl certificates and to encrypt the communication.
In the next blogpost, we will setup the Nexus repository and prepare it for use with docker.
The post Creating an artifact repository appeared first on BIT.