
In this blog I will explain how to run a Fabric8 ensemble in the jboss-fuse-6.2.1.redhat-084 stack.
This blog covers the proces from start to end, and depending on your experience it will take between 1 and 3 hours to get the system up and running. So get yourself a cup of coffee and let’s go.
Installing and configuring the vagrant boxes
Requirements
We’ll be using Windows as host OS. Vagrant for Linux or OSX should be very simular.
Basics
– Oracle VirtualBox (5.0.12 r104815) At https://www.virtualbox.org
– Vagrant (1.8.1) At https://www.vagrantup.com/
Please note that some versions of Vagrant do not work well with certain versions of VirtualBox, in example vagrant 1.7.2 with VirtualBox 5.0.4 beta
For the full version support check the docs for vagrant at https://www.vagrantup.com/docs/virtualbox/
Vagrant supports other virtualization software too, but I’m not covering that part.
The stack
– jboss-fuse-full-6.2.1.redhat-084
– jdk-8u66-linux-x64.tar
Tools
– Text Editor that can handle Linux related files / line endings. I use Notepad++
– SSH client such as PuTTy, I prefer MobaXterm which has some neat built-in FTP tools and a text editor that uploads automatically once you save a file.
– Administrator rights on the local system (host OS) to modify the System32/Drivers/Etc/hosts file. If not then you may want to referer to the Vagrant docs to see how to forward ports (in example Hawtio, MQ, SSH).
Test
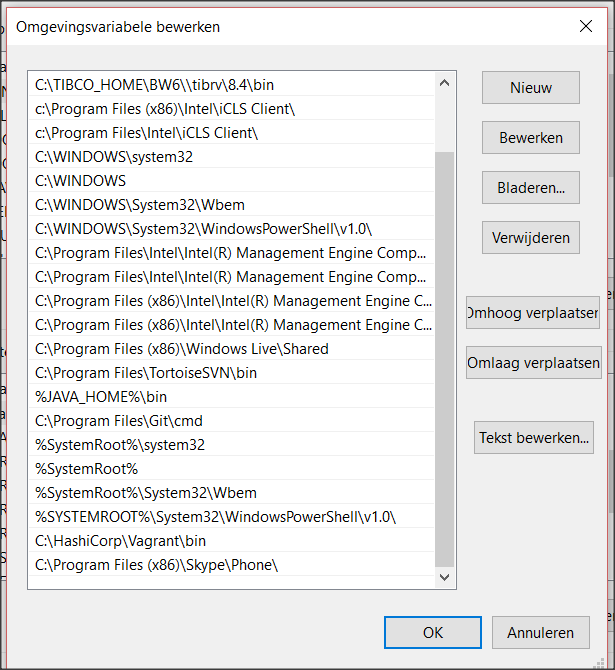
Once vagrant has been installed open a new CMD session and type “vagrant” in an empty folder. It should output commands. If it does not do that check the environment variable path whether vagrant is added.

Configuration – Vagrantfile
The thing vagrant needs to function is a vagrantfile.
This can be easily done by opening a CMD session in the targetted folder (in example F:/vagrant/Fabric8Ensemble). An easy trick is to press “CTRL + SHIFT and right click” to display the “Open command prompt here” in the mouse context menu.

Type “vagrant init” in the command prompt.
There should be a Vagrantfile in the target folder now, open it in Notepad++

The file contains some (commented) example parameters. The most important ones are the box and vm parameters. Another one we will be using is the “private network” option.

Read the example file carefully.
In my blog I removed the example code so it’s a bit easier to read.

Configuration – Machines
In this example we will be creating an ensemble of 3 machines. This way we cover some naming, networking and join commands. It’s possible to just create a Fabric8 with one machine but where’s the challenge in that right?
Vagrant file
So, we are going to setup a so called “multi machine” environment provided by a single Vagrantfile.
https://www.vagrantup.com/docs/multi-machine/
Firstly setup three machines. Call them what you like.
Note the groups and prefixes used to configure them.

Next up we are going to configure the machines.
In this case all machines have 4096MB ram and 2 cpus.
3 x 4gb = 12gb ram.
Please note that this ram is Physical and thus will not function if your machine has only 8GB ram.

Change the ram to suit your needs. For a Fabric8 ensemble I would say go with at least 2048MB ram per machine = 6GB ram total.
Adding the usb parameters will disable USB, in my VirtualBox environment USB was giving me errors when starting the machines.
Next we will be configuring the nodes.
We will provide them with:
– Type of box(https://atlas.hashicorp.com/boxes/search)
– MAC adress (VirtualBox does not do that automatically)
– Private network.

The machines should be able to run already.
Try it out using “vagrant up”.
To test a single machine in a multi-machine config run “vagrant up “fabricroot1””.
To stop the machine(s) type “vagrant destroy”.
To stop the machines without typing “y” every time use “vagrant destroy –f”.
The last step regarding the Vagrantfile is adding the scripts that will run the commands on the Linux guest system.
These may be according to your likings. Just make sure that the order is right, do not try to run fuse before installing java. Run apt-get update prior to the (first) apt-get install. Run apt-get update after adding a custom repository.

The .vagrant file
# -*- mode: ruby -*-
# vi: set ft=ruby :

Vagrant.configure(2) do |config|
config.vm.define "fabricroot1" do |fab1|
fab1.vm.base_mac="5CA1AB1E0001"
fab1.vm.box = "minimal/trusty64"
fab1.vm.provision :shell, path: "Script/rubix.sh"
fab1.vm.provision :shell, path: "Script/environment.sh"
fab1.vm.provision :shell, path: "Script/java.sh"
fab1.vm.provision :shell, path: "Script/fuse.sh"
fab1.vm.provision :shell, path: "Script/root1.sh"
fab1.vm.network "private_network", ip: "172.28.128.10"
end
config.vm.define "fabricroot2" do |fab2|
fab2.vm.base_mac="5CA1AB1E0002"
fab2.vm.box = "minimal/trusty64"
fab2.vm.provision :shell, path: "Script/rubix.sh"
fab2.vm.provision :shell, path: "Script/environment.sh"
fab2.vm.provision :shell, path: "Script/java.sh"
fab2.vm.provision :shell, path: "Script/fuse.sh"
fab2.vm.provision :shell, path: "Script/root2.sh"
fab2.vm.network "private_network", ip: "172.28.128.20"
end
config.vm.define "fabricroot3" do |fab3|
fab3.vm.base_mac="5CA1AB1E0003"
fab3.vm.box = "minimal/trusty64"
fab3.vm.provision :shell, path: "Script/rubix.sh"
fab3.vm.provision :shell, path: "Script/environment.sh"
fab3.vm.provision :shell, path: "Script/java.sh"
fab3.vm.provision :shell, path: "Script/fuse.sh"
fab3.vm.provision :shell, path: "Script/root3.sh"
fab3.vm.network "private_network", ip: "172.28.128.30"
end
config.vm.provider "virtualbox" do |v|
v.memory = 4096
v.cpus = 2
v.customize ["modifyvm", :id, "--usb", "off"]
v.customize ["modifyvm", :id, "--usbehci", "off"]
end
end
The .sh scripts
environment.sh
echo "============ Setting up environment (1/5) ============"
sudo apt-get update
sudo apt-get -y install zip unzip
echo "172.28.128.10 fabricroot1 frikandel" >> /etc/hosts
echo "172.28.128.20 fabricroot2 kroket" >> /etc/hosts
echo "172.28.128.30 fabricroot3 bamischijf" >> /etc/hosts
java.sh
echo "============ Setting up java (2/5) ============"
sudo su
mkdir /opt/jdk
echo "============ Installing java (3/5) ============"
tar -zxf /vagrant/SharedFiles/jdk-8u66-linux-x64.tar.gz -C /opt/jdk
update-alternatives --install /usr/bin/java java /opt/jdk/jdk1.8.0_66/bin/java 100
update-alternatives --install /usr/bin/java java /opt/jdk/jdk1.8.0_66/bin/javac 100
fuse.sh
echo "============ Unzipping fuse (4/5)============ "
unzip /vagrant/SharedFiles/jboss-fuse-full-6.2.1.redhat-084.zip -d /home/vagrant/
sudo chmod -R 777 /home/vagrant/jboss-fuse-6.2.1.redhat-084/
echo "============ configuring fuse environment (5/5)============"
echo "source /vagrant/SharedFiles/.bashrc" >> /home/vagrant/.bashrc
We have to add three lines to our .bashrc script. This will setup java_home and give us the ability to type in “client” in the bash shell to open /home/vagrant/jboss-fuse-6.2.1-redhat-084/bin/client directly. I did this by starting an image, downloading the file and modifying it locally.

root1.sh
echo "============ Fuse should be online soon! Use http://hostname:8181/ ============"
sudo cp -a /vagrant/ConfigurationFiles/root1/etc/62/. /home/vagrant/jboss-fuse-6.2.1.redhat-084/etc/
hostname frikandel
/home/vagrant/jboss-fuse-6.2.1.redhat-084/bin/start
root2.sh
 echo "============ Fuse should be online soon! Use http://hostname:8181/ ============"
sudo cp -a /vagrant/ConfigurationFiles/root2/etc/62/. /home/vagrant/jboss-fuse-6.2.1.redhat-084/etc/
hostname kroket
/home/vagrant/jboss-fuse-6.2.1.redhat-084/bin/start
root3.sh
 echo "============ Fuse should be online soon! Use http://hostname:8181/ ============"
sudo cp -a /vagrant/ConfigurationFiles/root3/etc/62/. /home/vagrant/jboss-fuse-6.2.1.redhat-084/etc/
hostname bamischijf
/home/vagrant/jboss-fuse-6.2.1.redhat-084/bin/start
Windows Host file
Next up is the windows host file. Mine is a mess because i’m running Docker and Openshift as well but in the hosts file on line 22,23,24 you can see the three vagrant boxes.

Preparing the distributed configurations.
Folder structure

General files
The next step is to prepare the files we will be distributing to our boxes.
– Jboss-fuse-full-6.2.1-redhat-084 is used in fuse.sh
– jdk-8u66-linux-x64.tar is used in java.sh
I shared these files to my boxes to save 800mb * 3 = 2400mb download size.

Machine specific files
We will be sharing configuration files from a local file system so that we do not need to modify the files and repack them into the fuse zip which is not what you want.
The files users.properties and system.properties are used by fuse.
System is unique for each root container in the fabric8 ensemble, users.properties is the same for each root container, but if you like different login credentials this is how to do that. This method also works for any other file under the /etc folder of fuse.

Repeat the steps for root2 and root3. Change folder names to your likings, but do not forget to modify the .sh scripts that use the files.
Vagrant up
That’s it. The machines are ready to start.
This could take some time.
Configuring the Fabric and joining the ensemble members
MobaXterm
Setup three SSH sessions like so.

SSH
Open the terminal to Frikandel and run client.
Open the JBossFuse client for Karaf.
(Note that I linked the “client” command in the .bashrc script)
[05:23:27 vagrant@frikandel:~] $ client
JBossFuse:admin@frikandel>
Now type in fabr and press on TAB.
It should say fabric:create, fabric:join, fabric:welcome
We are going to create the following setup:
– Frikandel creates the fabric
– Kroket joins the fabric
– Bamischijf joins the fabric
– Fabric adds Kroket and Bamischijf to ensemble
Create a fabric
Start off by creating the fabric.
To make sure naming and IP’s go well we use a custom command:
“fabric:create –resolver manualip –manual-ip frikandel –zookeeper-password admin”
Ideally you want to expand it with the “–wait-for-provision” command.
Now, I’m using the manualip and refer that to a hostname linked in the etc/hosts file. I’m not sure wheter this is neat but it worked but me.
Join a fabric
Open the terminal to kroket and run client.
Now use this command to join:
“fabric:join –resolver manualip –manual-ip kroket frikandel”
Type admin as password.
This command will also setup the manualip as “kroket” and join “frikandel” which is again defined in /etc/hosts
Open the terminal to bamischijf and run client.
Now use this command to join:
“fabric:join –resolver manualip –manual-ip bamischijf frikandel”
Type admin as password.
This command will also setup the manualip as “bamischijf” and join “frikandel” which is again defined in /etc/hosts
The fabric
We should have a fabric of three root containers now. On my machines they do not provision well so I just added jboss-full profile tot he containers. Perhaps they will provision well when using an IP or changing the –manualip to –hostname or something simular.

Add the profile to the containers

Now they are green.

The ensemble
The last thing we have to do is add the members tot he ensemble by using one simple command.
Open the client on the frikandel box.
Run the command:
“fabric:ensemble-add kroket bamischijf”
Type “yes”
Congratz
Congratulations, you now have a high available ensemble.

Thanks for showing your interest in my blog.