When I think of craft beers, I think of long beards and oiled mustaches. The biggest community of craft drinkers are definitely the hipsters and HelloBeerTM wants to add the contents of their shiny leather wallets to its bank account. So high time to get those hipsters on board and dive into JHipster.
JHipster is a generator tool able to generate web applications based on a Spring Boot back-end (exposed via REST) and an Angular front-end. In this first part of a series of blog posts – in which we’re gonna delve into JHipster to discover its nooks and crannies – we’ll generate our first (monolithic) JHipster application.
I’ll assume that you’ve got your JHipster development environment all set up (steps can be found here (choose Local installation with YARN)). I’m using the current latest version of JHipster, i.e. 4.14.1.
The GitHub code can be found here.
First contact
Let’s hit the ground running and generate the skeleton of our first JHipster application. We’ll put the project in the hb-jhipster directory and call it HelloBeer:
jhipster
The CLI (Command Line Interface) of JHipster will ask a lot of questions and demand answers to every one of them. Let’s choose the defaults for most of them, except for the package name (nl.whitehorses.hellobeer). We’ll also add support for an additional language (Dutch) besides English.
A couple of seconds after we answered the last question (10 seconds on my laptop), the application will be generated and can be started in two steps:
The back-end can be started with Maven by the following command:
./mvnw
The front-end can be fired up with the help of YARN:
yarn start
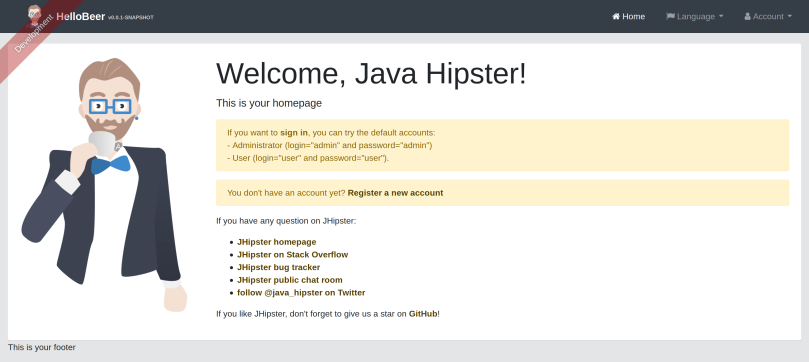
After both components have been started, the application greets us on localhost:9000:

The application doesn’t have any business value yet, but it’s nice to see that with just a few steps we got a working application for free, with a homepage, login screen, user registration functionality, i18n and a most helpful Administration menu. That menu gives us insight into the inner workings of our JHipster app. It enables viewings of metrics, logs and it gives us a page displaying all the (Spring Boot) Swagger APIs available in the app (every REST service we’ll add to the application will be automatically added to this page):

Domain model
Our beers aren’t exactly flowing yet. The most important part is still missing: getting the domain model in place! There are two ways of doing this: JHipster UML and JDL Studio. I’ll use the latter, since it’s an online editor that’s very easy to use. Simply hop over to https://start.jhipster.tech/jdl-studio/ and you’re good to go!
We’ll use a slightly more complex domain model than the one we’ve used in my previous blog – which basically was just one domain object – albeit the most important one – Beer. In this blog I’ll use a few objects with relationships, just to get the most out of JHipster.
There will be a Beer object, a Brewery object, an InventoryItem object and an ItemStockLevel object. The domain model will allow us to keep track of our inventory of crafts – the types and stock – and will demonstrate how JHipster will generate its back- and front-end with multiple related tables involved.

As you can see in the upper figure: you’ll get a nice diagram on the right for free when typing out the model on the left. This is the entire model in text form, which you get when you download it to your computer:
entity Beer {
  name String required
  type BeerType required
}

enum BeerType {
  LAGER, PILSNER, PALE_ALE, INDIA_PALE_ALE, PORTER, STOUT, OTHER
}

entity Brewery {
  name String required
  countryName String
}

entity InventoryItem {
  itemDescription String,
  serving ServingType required,
  amount Integer required,
  rating Integer
}

enum ServingType {
  CAN, BOTTLE
}

entity ItemStockLevel {
  stockDate ZonedDateTime required,
  quantity Long
}

relationship ManyToOne {
  Beer{brewery} to Brewery
}

relationship ManyToOne {
  InventoryItem{beer} to Beer
}

relationship ManyToOne {
  ItemStockLevel{inventoryItem} to InventoryItem
}

// Set pagination options
paginate Beer, InventoryItem with pagination
paginate Brewery with infinite-scroll

// dto * with mapstruct

// Set service options to all except few
// service all with serviceImpl
By default JHipster will generate Controller classes per Entity. These Controllers will delegate directly to the Repository classes exchanging the domain objects.
If you need more control you can uncomment the “dto * with mapstruct” and “service all with serviceImpl” lines. This will generate Service classes in between the Repository and Controller classes together with DTO classes. These Service classes will map the Entity objects (used by the Repository) to DTO objects (used by the Controller). So these DTO objects will be exposed to the front-end instead of the Entity objects, giving you a lesser coupled application.
For now lets stick to the architecture without the Service layer and leave those lines commented out.
jhipster import-jdl jhipster-jdl.jh
The CLI will ask you to override some files, choose yes for all of them (option a).
CRUD
When you fire up the application again, you’ll see that the Entities menu contains four additional entries (one for each domain object). Play round a bit. This is the Inventory Items page after entering some data:

And this is the Edit screen available when you click on the Edit button on the first row:

As you can see, the required field are nicely validated (green when filled, red when empty), pagination is added and basically all the CRUD functionality is there. Pages are bookmarked as well. The above page eg. is available on the URL http://localhost:9000/#/inventory-item. Error and confirmation regions are displayed on the page when the data entered is invalid, resp. committed.
The biggest issue with the pages as-is after generation are those ugly ids you need to select to connect to a related domain object. Those same ids are displayed in the overview page. For example instead of the Beer Name (which is a Brand Pilsner) we’ll see a 1 displayed in the above screenshots.
Back-end
Don’t worry. There’s quite a few JHipster blog posts in the making and in those we will dissect quite a bit of all the objects that JHipster generates. And generate some more!
The thing I’d like to show you right now is how to test those Spring Boot REST services. We’ll need an endpoint and also a security header to test one of the services. Let’s check the Swagger page for the InventoryItem (login as an admin user). All the information to fire a GET request is available under the Try it Out button:

You need the Request URL and the Authorization header (the value unfortunately changes with every restart). Here’s a test with Postman:

Front-end
The screens JHipster generates are functional albeit a bit crude. In the next blog post we’re gonna beautify ’em: getting rid of those ugly ids for one, use a calendar, add some auto-suggesting and who knows what else.
For now we’re gonna do some simple configuration, without changing any code: we’re gonna change the footer and beautify those list items a bit, so INDA_PALE_ALE will be displayed as Inda pale ale.
This is all part of the i18n functionality of JHipster. All the customized labels are available in JSON files in the src/main/webapp/i18n directories. Let’s change the beerType.json files (English and Dutch) :

The footer can be adjusted in the global.json file:

Now let’s fire up the application again, switch to the Dutch language and see the changes on the Beer page (check the footer and the Pilsner type):

Summary
That’s enough for now! In this first blogpost on JHipster we’ve seen how easy it is to get a basic CRUD application up and running. Most of the work goes into building the domain model and the rest of the heavy lifting is done by JHipster.
We’ve also done a little customization on the front-end. In our next blog post, we’re gonna look at how difficult or easy it is to spiff up the front-end a little more. So grab a beer and stay tuned!