
In my last post we created a chat server application for Weblogic 12c. A chat server is only useful when you have an application who makes use of the chat service. And that is exactly what we are going to do in this post.
These days there are very few applications that are created without some sort of framework, or multiple frameworks. Thats why we will use a number of frameworks as well for our chat application. In our case this will be AngularJS for application logic and data binding combined with Bootstrap for the user interface. AngularJS is very popular and when you combine angular with a number of tools you can be extremely productive. In our case we will use Yeoman, Bower and Grunt to support our development. Yeoman does scaffolding, while bower manages packages. Grunt is a powerful task runner which can do things as act like a javascript web server, run automated testing as well as building and packaging your app. How they exactly work is beyond the scope of this blog. However this article is an interesting read if you want to know more about them. (and you really should if you are considering using AngularJS).
Also we have included ui.bootstrap directives which make it easy for AngularJS to interact with the Bootstrap components. Finally we are using ngSocket to provide an easy interface to Web Sockets.
To be clear, this post is not a tutorial on how to start working with AngularJS or any of the other frameworks involved. It is intended to show you how to use the strengths of various frameworks to quickly develop an entire application.
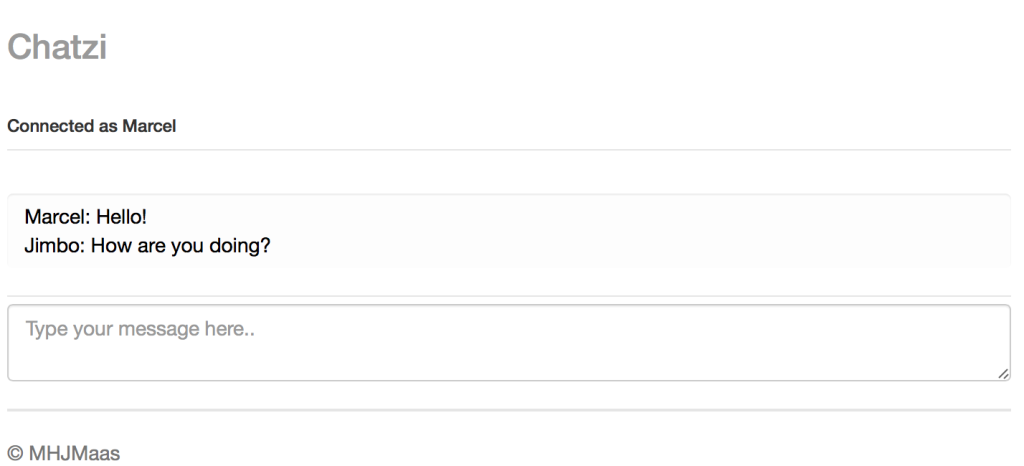
Ok, so lets get back to our app. It is called Chatzi and it is a really simple app with the potential of becoming great. It allows everyone who accesses it to enter a username and start chatting in one big chatroom. The interface looks as such:

The interface which you see here is made using the bootstrap framework. This saves us some time thinking about responsive design as well as the initial styling. It also gives us some components such as Modal popups. We sort of got this for free when we kickstarted our project with the (Yeoman) command:
“yo angular”

Yeoman then creates our project in the current directory and sets up Bower and Grunt as well. So what we have now is a fully fledged application which does absolutely nothing. We can run it using the command “grunt serve” which will start a javascript server and launch your browser with your application.

Notice the responsive design when you resize the browser window. We did absolutely nothing to facilitate this. This is Bootstrap at work, you can read all about it here. Now we can modify the html code in the “views/main.html” to suit our needs. You will need to know something about the style classes bootstrap uses but for the rest it is mostly self explanatory.
<div class="header">
  <h3 class="text-muted">Chatzi</h3>
  <h6>{{connectionStatus}}</h6>
</div>

<div class="messages-panel">
    <textarea id="messages-area" ng-model="messages" readonly class="form-control"></textarea>
</div>
<div class="input-panel">
    <textarea id="input-field" ng-model="message" class="form-control" placeholder="Type your message here.." ng-enter="sendMsg()"></textarea>
</div>

<div class="footer">
  <p>© MHJMaas</p>
</div>

<script type="text/ng-template" id="myModalContent.html">
    <div class="modal-header">
        <h3 class="modal-title">Welcom to Chatzi, what is your name?</h3>
    </div>
    <div class="modal-body">
        <form role="form" name="nameForm">
            <input name="name" placeholder="Your username here..." type="text" required="true" ng-maxlength="50" ng-minlength="2" ng-model="name" class="form-control" ng-enter="ok(name)"/><br/>
        </form>
        <br/>
        You chose: <b>{{ name }}</b>
    </div>
    <div class="modal-footer">
        <button class="btn btn-primary" ng-click="ok(name)" ng-disabled="!nameForm.name.$valid">OK</button>
    </div>
</script>
Now lets have a look at this html code. The first parts make up the screen. As you can see we display the connection status in the header using AngularJS bindings using the brackets syntax. Whenever we change the “connectionStatus” variable in the scope, the value is automagically updated in the view.
On to the “messages-panel”. Here we display received chat messages. Notice the use of the “ngModel” directive. This does essentially the same as the bracket syntax which is bind to the messages variable on the scope. The “input-panel” directly below contains the text-area which allows us to actually send message. We have created a custom directive to submit the message when we press the enter key. Also note the use of the ng-model binding again.
Finally at the bottom is a custom template for the modal popup which will be instantiated using the ui.bootstrap.modal directive with its own scope as you will see in the next part of this blog.
So, on to the code. This is where it all comes together. Lets take it step by step.
// Please note that $modalInstance represents a modal window (instance) dependency.
var ModalInstanceCtrl = function ($scope, $modalInstance) {

  // Close the modal while returning the name
  $scope.ok = function (name) {
    $modalInstance.close(name);
  };

};
This part contains the controller and scope which is linked to the “myModelContent.html” template we have seen before in the view. Its functionality is quite simple, it has only one method which returns the name back to the calling controller. The “ok” method is called from the template which passes in the entered name because it was made available on the scope by the “ng-model=’name’” declaration.
Now lets move on to the instantiation of the main controller:
angular.module('chatappApp')
  .controller('MainCtrl', function ($scope, $modal, $log, ngSocket) {
    $scope.username = null;
    $scope.connectionStatus = 'Disconnected';

    var ws; // reference to the websocket connection
    var messagesArea = document.getElementById('messages-area'); // reference to the messages textarea
We simply create a number of variables on the main scope to save the username and set the connectionStatus. Also we get some references we will reuse.
As soon as we have started the application we want to check if we have username available. If not we want to ask for a username and launch the modal popup. The following code does exactly that.
    if ($scope.username === null){
      $scope.open('sm');
    }
Whoa! Where does this open function come from all of a sudden? Well, we defined it and it contains quite a lot of logic. Here it is:
// Opens the modal of a specified size
$scope.open = function (size) {
var modalInstance = $modal.open({
templateUrl: 'myModalContent.html',
controller: ModalInstanceCtrl,
backdrop: 'static',
size: size
});
// when the modal is closed using the &quot;OK&quot; button
modalInstance.result.then(function (name) {
// save the username and set the status
$scope.username = name;
$scope.connectionStatus = 'Connecting...';
//Open a WebSocket connection, change this url to point to your chatserver
ws = ngSocket('ws://localhost:7101/chat/server');
// this method resizes the messages textarea to make sure all of the content fits
// If not this method makes sure it uses the entire screen and scrolls to bottom to see the latest messages
function resize () {
// save the old height in case we need it later
var oldHeight = messagesArea.style.height;
// set the height of the textarea to match the height of the content
messagesArea.style.height = 'auto';
messagesArea.style.height = messagesArea.scrollHeight+'px';
// if the height of the body exceeds the height of the window, then use the old height which should be an exact fit
if (document.body.clientHeight &gt; window.innerHeight){
messagesArea.style.height = oldHeight;
}
// and scroll to the bottom
messagesArea.scrollTop = messagesArea.scrollHeight;
}
/* 0-timeout to get the already changed text */
function delayedResize () {
// this is to make sure the text was added before we calculate height
window.setTimeout(resize, 0);
}
// This function is called when a message is returned from the server. Of course this is a simple implementation
// of a protocol which you can expand on.
ws.onMessage(function (msg) {
// check what the message means
if (msg.data === 'connection accepted'){
$scope.connectionStatus = 'Connected as ' + $scope.username;
} else {
// its a chat message. msg.data is a json string so parse it before we can use it.
var data = angular.fromJson(msg.data);
if ($scope.messages === undefined) {
$scope.messages = data.message;
} else {
$scope.messages = $scope.messages + 'n' + data.message;
}
delayedResize(); // resize the messages area to fit the content.
}
});
});
};
Lets take it from the top. The first part opens the modal using the specified html template as well as controller. Note the ‘backdrop: static’ declaration. This makes sure the modal can only be dismissed using a button, and not by clicking outside of it. Because we really need a username! Next up is the code that handles the dismissal of the modal using a username. We will then save the username on the scope and start the WebSocket connection using the URL we defined in the ChatServer Application from our previous blog post.
The resize function makes sure the messages text-area gets the correct size for displaying all of the chat messages. The comments will be sufficient for you to understand what is going on.
As you can see we will handle received chat messages by adding them to the messages variable and then call the resize method after a delay. This is a hack to allow the website to render first so we can get the actual height including the just received message.
Pfew… that’s it right? Oh wait, we still need to send chat messages as well. Luckily this is done quite easily. Consider the following piece of code:
    $scope.sendMsg = function(){
      ws.send($scope.username + ': ' + $scope.message);
      $scope.message = '';
    };
It’s that easy. Lets not forget to empty the message variable so that we can immediately start typing our next message. The final component is the directive to detect the pressing of the “enter” key.
.directive('ngEnter', function() {
    // This directive detects an enter keystroke and calls the specified function
    return function(scope, element, attrs) {
      element.bind('keydown keypress', function(event) {
        if(event.which === 13) {
          scope.$apply(function(){
            scope.$eval(attrs.ngEnter, {'event': event});
          });

          event.preventDefault();
        }
      });
    };
  });
This is very specific code for the AngularJS Framework. I suggest you dive into AngularJS directives to really understand this code. The main part here is the fact that we listen to the keydown and keypress events. When the keycode is 13 (where 13 = enter) we simple call the specified method in the template.
So there you are. Run the command “Grunt serve” if you havent already and start chatting. You can see how instantly the chat messages get broadcasted by using two different browsers side by side. This is possible because of the live connection the server and because the server pushes the messages in real-time.
Of course you can find the entire project right here. You need to run the commands “npm update” and “bower update” from the directory before you can all “grunt serve” to get all the packages needed to run the application.
Now there is a lot that can be improved in this application, such as remembering of your username as well as a list of connected clients and perhaps some color to make it easy to identify everyone… I might just write some posts about that as well, so stay tuned!
Until next time!